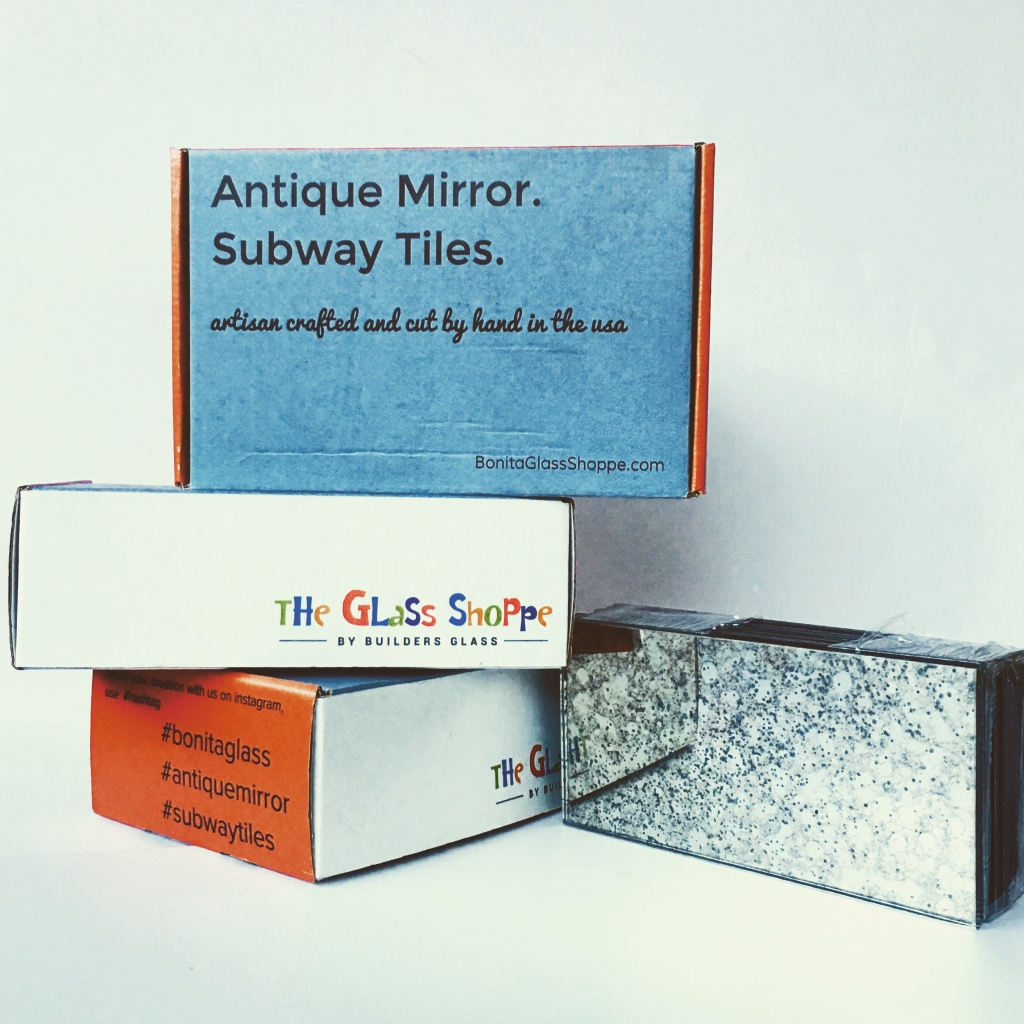
Click on this picture to purchase from our Strip Tiles store!
This is the story on how Strip Tiles Shop, and the antique mirror subway tile, was born.

I love antique mirror.
We love antique mirror. I have loved it for a long time, so you can imagine my excitement when it started popping up in home decor photos all over the internet in the last year. I pinned on pinterest, I saved to my ideabook on Houzz, I searched high and low for suppliers. I ordered samples from all of them. I foolishly thought I could do better.
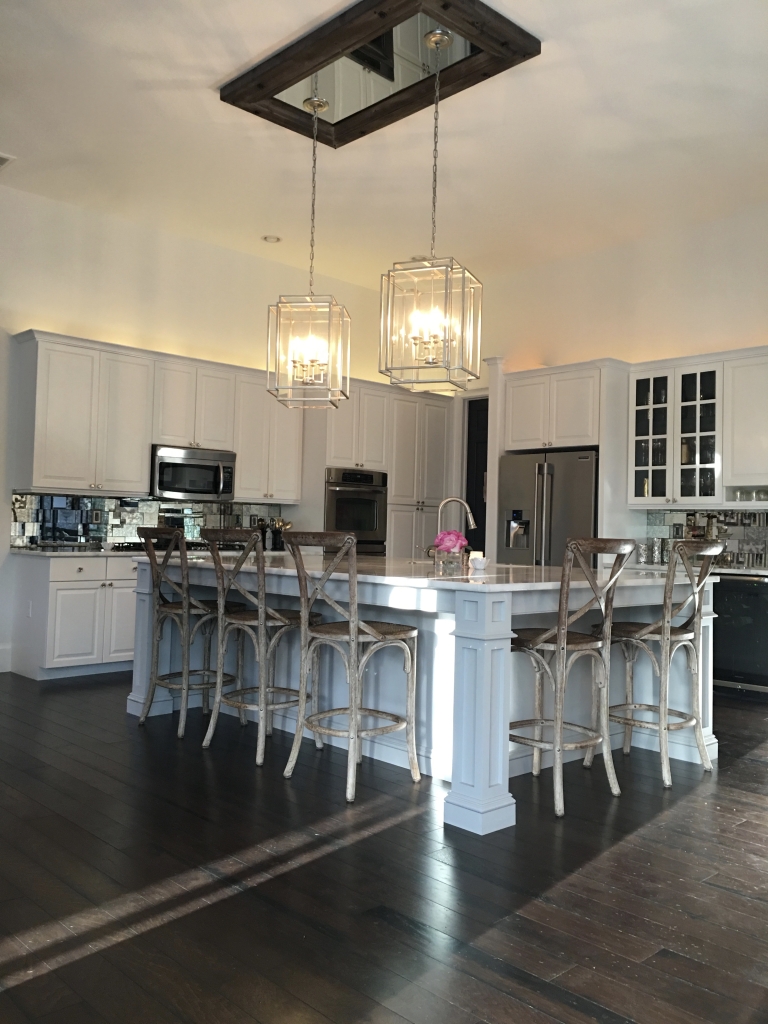
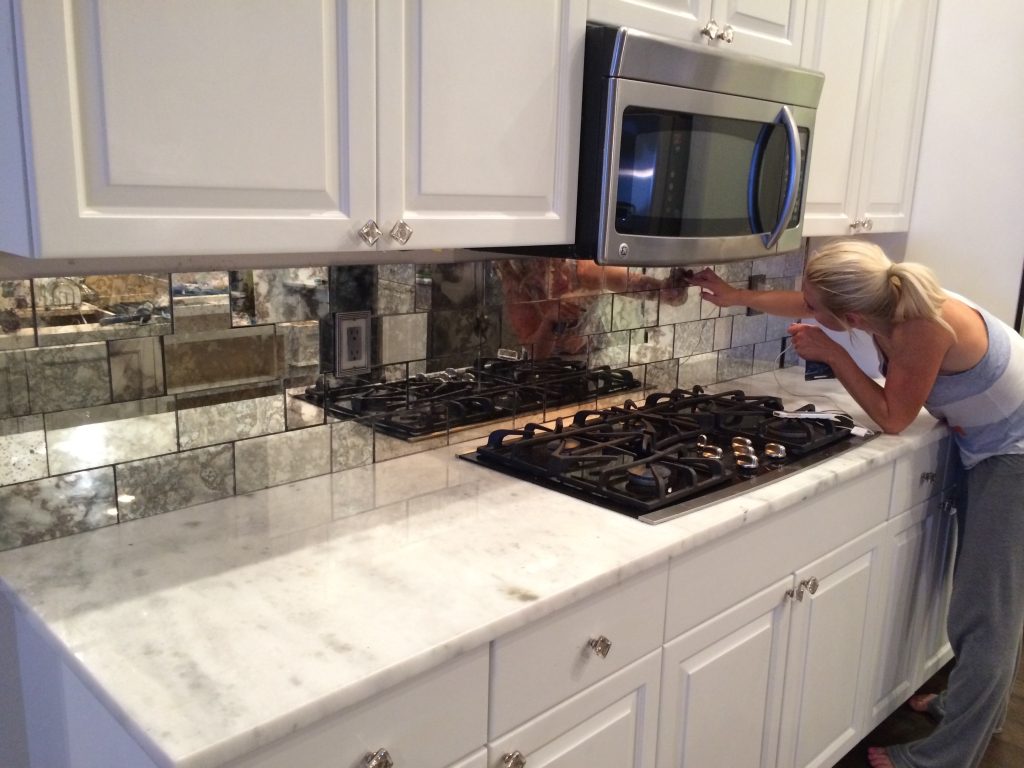
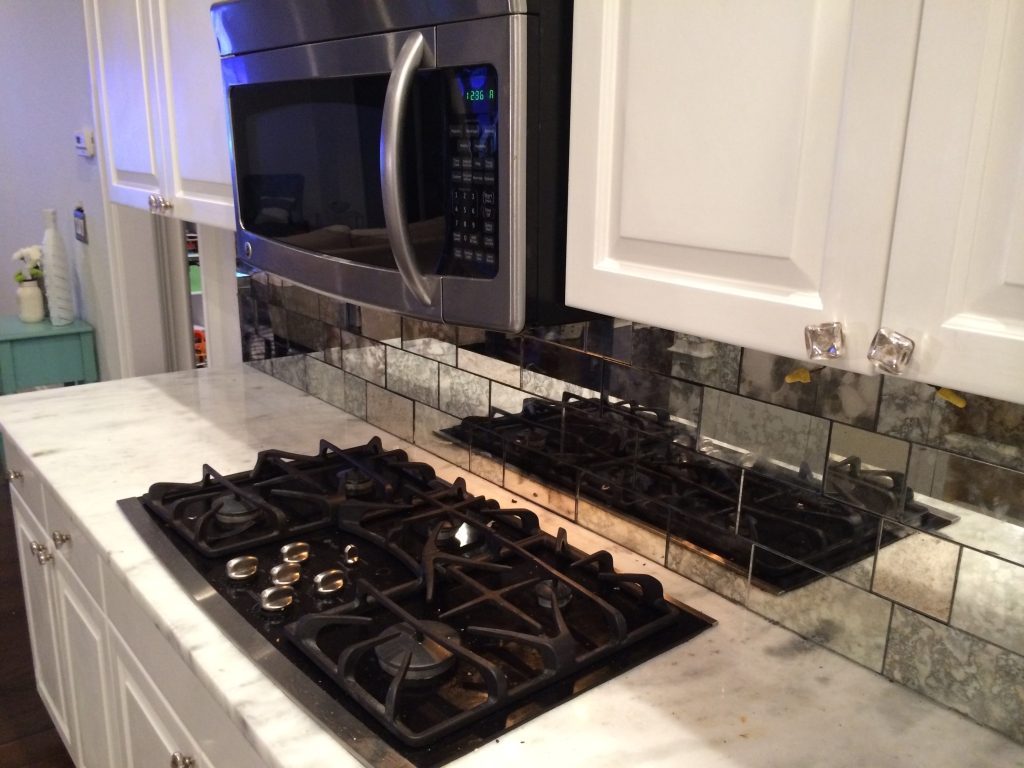
Complete Kitchen Makeover, featuring the Antique Mirror Subway Tiles! Yes, we put a mirror on the ceiling too. This was a bit more complicated, it’s going to need it’s own blog post.
I tried making my own. I have endless mirror to practice on, why not right? Wrong. Do not try and make your own antique mirror. The supplies of muriatic acid and paint stripper should have been red flags. Not only did I make a huge mess, I failed, and I’m here to save you from wasting your time and mirror. I eventually gave in, and ordered a few sheets to have in stock and ready to go for that first client.
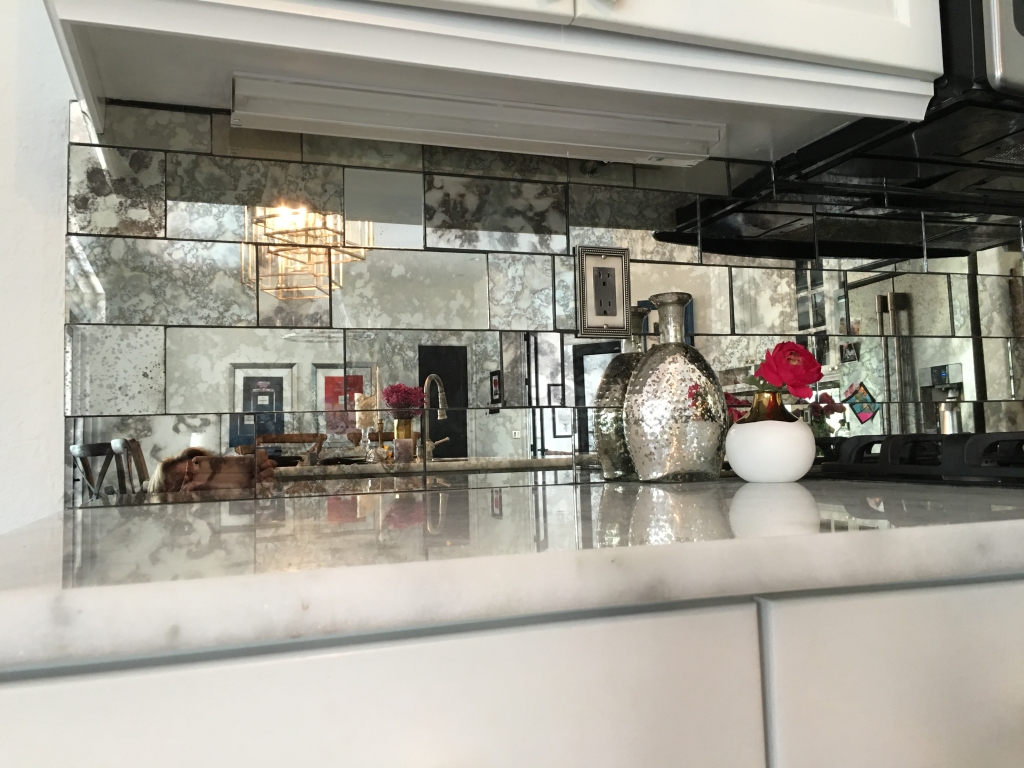
I was dying to get to work with all of this antique mirror. i envisioned antique mirror in non-traditional settings, even contemporary. I really wanted to do a kitchen backsplash in antique mirror. I didn’t want to wait any longer. When my younger sister, Britten, was looking at buying a new house, I secretly hoped her new kitchen would have a backsplash for me to transform. Before the papers were signed, she agreed that an antique mirror backsplash would be perfect. I started envisioning what my, ahem her, backsplash would look like.
It’s a long story about this antique mirror.
I felt it important to leave all the details, because it really is, all in the details. The details begin at our first meeting.
We had time to design what I had in mind. Her new counter tops weren’t going to be in for 4 weeks, and we couldn’t measure until then. We had our first ‘meeting’ where my sister picked out which antique mirror she wanted. I quickly ordered a sheet. I knew it was time to start laying out the design. We had discussed doing a diamond design, so I did a couple drawings to scale with a taller diamond and a more square shaped diamond. Basically variations of the ‘Harlequin’.
Harlequins no more
Now it’s time for our second meeting. I showed her the drawings, and now I find out harlequins are out, she doesn’t want any stinkin’ diamonds. Thank god. Harlequins have their place, perhaps in a nursing home, but this was not the place. Now she is trying to describe what she wants to me. Words were coming out and she described rectangle brick looking tiles. I could see it, she was describing subway tiles. Interesting. Antique Mirror Subway Tiles. Since I know so much about Subway Tiles, I told her they should be 4″ x 8″, like the standard subway tiles. She agreed, but she also wanted some square ones too. Yes, some squares 4″ x 4″ and random sized tiles 4″ x 6″, because we can’t ever be too predictable.
Disclaimer- turns out subway tiles are actually 3″ x 6″. When this post was originally written a few years ago, there were no Antique Mirror Subway Tiles. I had no idea I was manifesting the future size of the antique mirror subway tile. I had no idea we were starting a phenom. I call this a happy accident. The size of 4″ x 8″ was written. And it’s the perfect size.
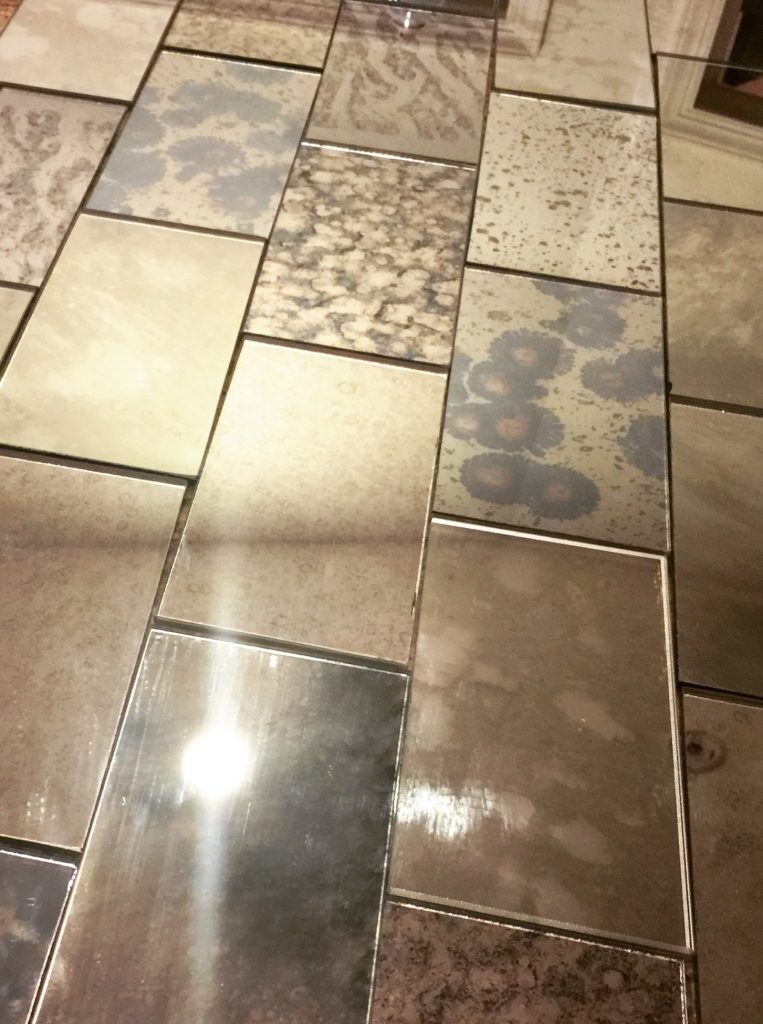
This is a photo of some of the new antique mirror tiles we have, showing a mixed batch of 8 different tiles together! See how well they can mix? definitely adds some interest to your project.
Why pick one antique mirror when you can pick 5
We now have our 3rd meeting, a 2 hour meeting, to draw it out one more time. At this point she decides that it would look much better if we mixed a few different antique mirror patterns together. So now we have different size bricks to be cut out of different antique mirror patterns. I had to agree about mixing the patterns, damn she was good. I had considered the idea of using various antique patterns, but quite frankly, didn’t want to open another can of worms. Now she had the same idea and there was no turning back.
I show her the 3 other types of antique mirror I have in stock. She doesn’t like them, none of them. She’s turning into a devilish, design diva, right before my eyes. I loved her for it. She was as passionate about this mirror as I was. I explained to her that antique mirror only comes in a stock sheet, and ordering 3 more sheets would quadruple the price. She wasn’t breaking. She wanted what she wanted. We finish up this meeting around 7:00…..after she has decided on the perfect percentages of each antique mirror pattern. You read that right, the backsplash would contain various patterns in allocated percentages- 40% of her favorite, 30% of #2, 20% and 10% of another one to spite me. I counted how many bricks total in the drawing and did the math. The next day I called to place the order to find out one of her selections is being discontinued and they don’t have another one in stock. I made the executive decision to select a replacement. She was going to have to deal, consultations were complete.
It was finally time to start cutting all this antique mirror up, over a hundred antique mirror subway tiles. The various patterns were cut into the various size subway tiles in no time, and the crew was scheduled to install on Thursday. Thursday morning the crew is wondering if she will be home for the installation. They were concerned she might be particular on the placement of these different patterns. She might be particular? Why hadn’t I thought about this? Of course she was going to be particular. When I found out she was not going to be home until the late afternoon, I knew we had a problem. They suggested dropping off all the mirror and she could lay it out how she wanted, and they could install it next week.
‘I knew what this meant. She was not going to wait until next week. This meant, my sister and I, were going to be installing this backsplash ourselves.’
I know a little something about mirrors, and Britten had installed her glass tile backsplash years ago in her first house. I felt this made us overqualified for this installation.
Saturday night, of course
I called her up, and she was at my shop in 20 minutes to pick up all that beautiful antique mirror. She was not waiting for this backsplash any longer. My crazy sister was looking at me like ‘so are we going to do this now, or do you have some work to finish up still?’ Unfortunately I was headed out of town, that very minute, and wouldn’t be back until Saturday night. ‘No problem”, she told me, ‘come on over after your trip and we will do it Saturday night.’ Well that was a relief, hearing her say ‘No Problem.’ But wait, did she just say Saturday night? Saturday night, after I traveled all day? I don’t remember having a choice on this. Saturday night it was. I arrived at her house around 7:00. I should also mention I have my 3 kids in tow. When I told her I would have the kids Saturday night, she was kind enough to tell me it was fine if I brought them. So there we all were. I find her there in her massive living room, all the mirror laid out, puzzling the perfect distribution of antique mirror tiles together.
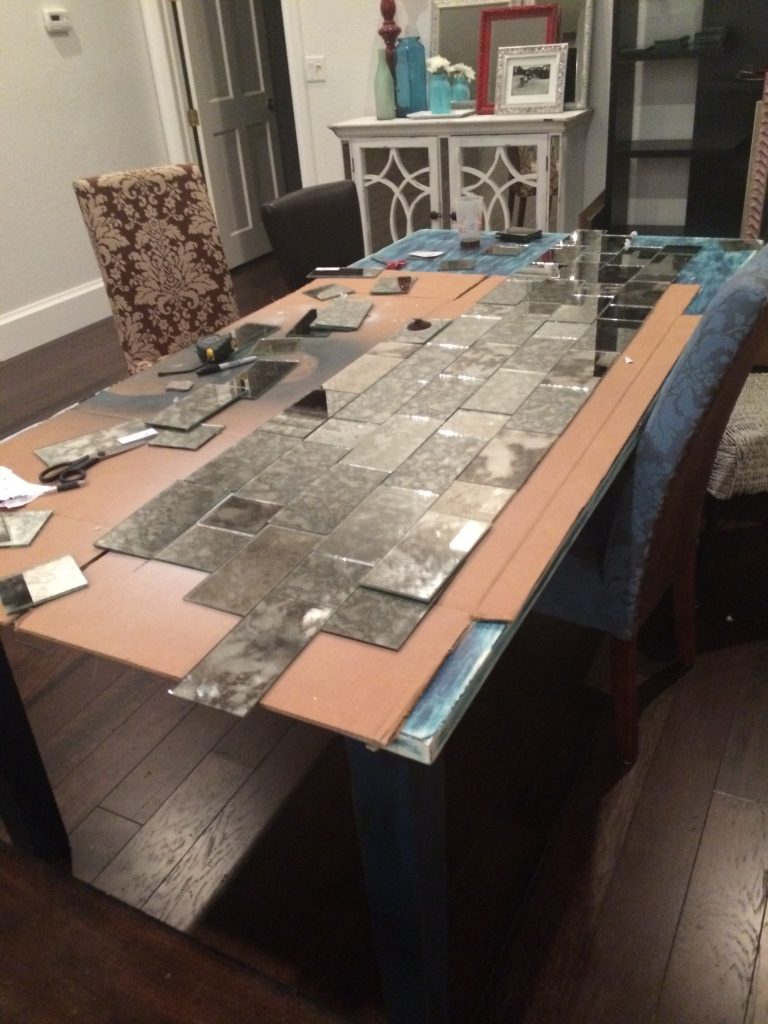
Sister was very serious about the placement of each piece of mirror. I think she spent a few hours arranging, and rearranging, the tiles. We eventually moved this entire table into the kitchen, so we could work right off her design.
Not done designing
She wanted the antique mirror tiles staggered, and of course appear to be effortlessly staggered, an organic flow. I was a little nervous about this idea, subway tiles are always evenly staggered. By 9:00 she confirmed she wanted none of that boring nonsense. It is antique mirror after all, it’s beauty is in the perfectly imperfect. It should look as if we scoured every vintage antique market across the country to piece together this antique mirror backsplash. Masterpiece.
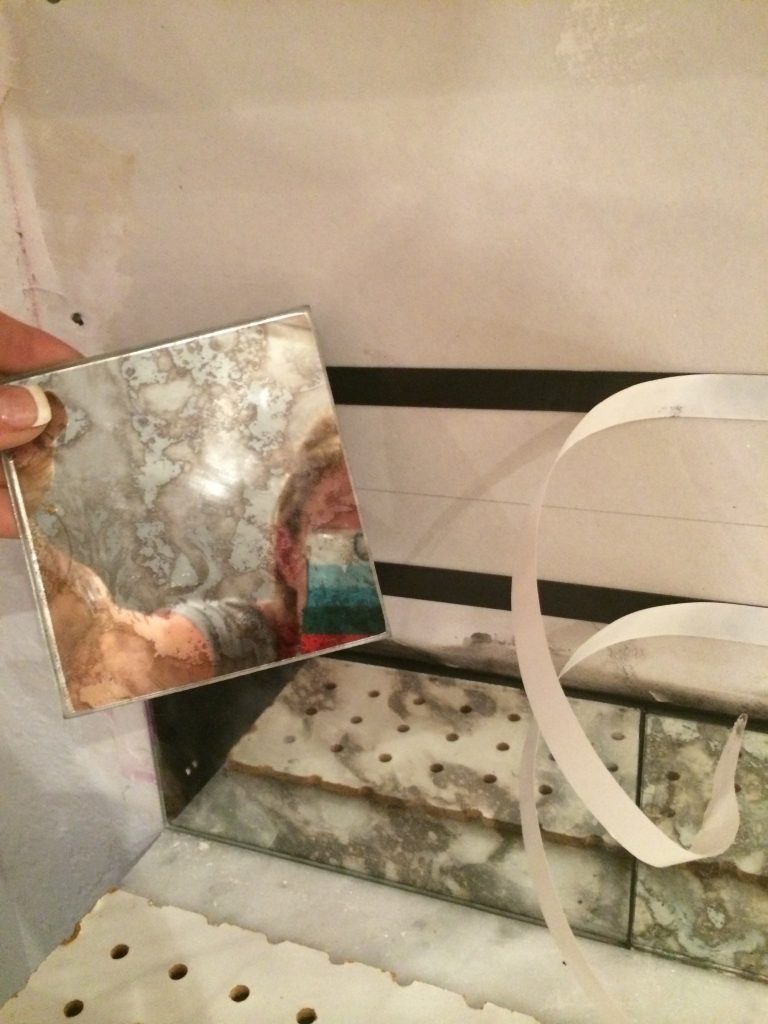
We got to work. We were playing around with putting a few pieces up, and I knew we needed something. I wanted the edges of each tile to be more aged, dark antiqued edges. Remember how I told you never to try making your own antique mirror? I did not take my own advice in that moment. I had the idea to further antique the already antique mirror. There we were in the garage, sanding, stripping and trying to further the antique-ness. This was just plain nonsense. Don’t do this.
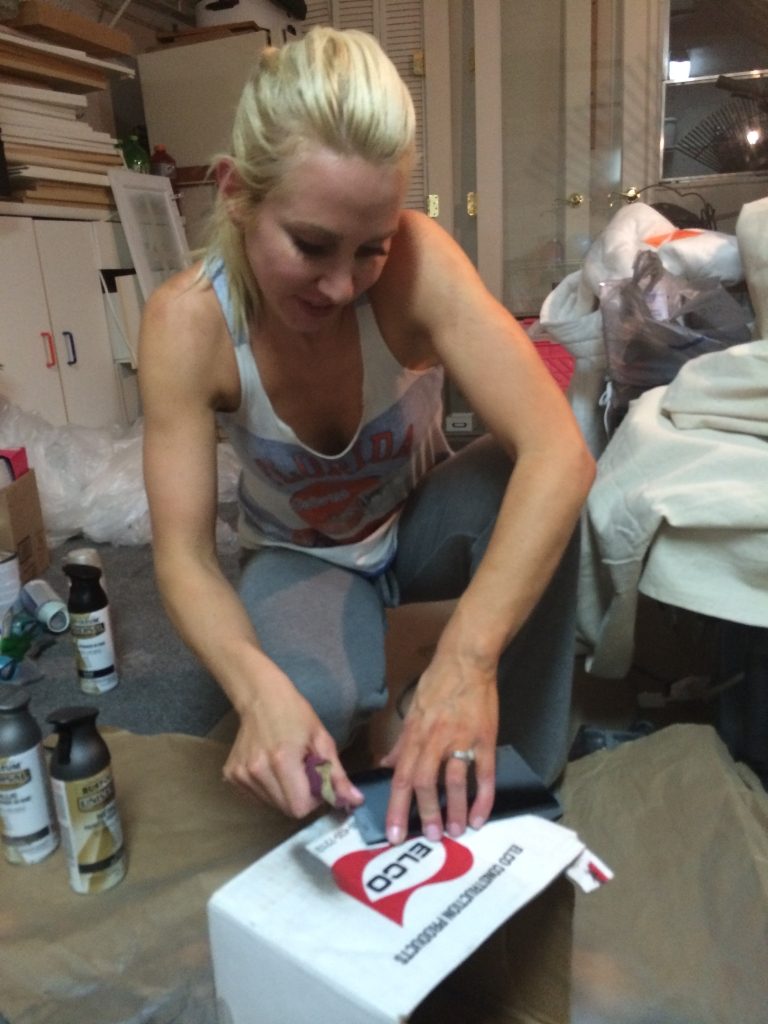
Our failed attempt at trying to further antique the edges of the mirror
We had lost our minds. This was nonsense. I don’t know why we were so fixated on this. I had to come up with another way to create the dark, aged, edge. I was turning into the crazier one. I had an idea. We needed silicone. Silicone is the only thing I knew of that will deteriorate the edges of mirror quickly. Silicone and mirror don’t mix, but for this it was perfect. We headed to Lowe’s for Silicone. We were in luck, they were open until 10:00.
While at Lowe’s I gathered a few more supplies for our project ahead. The girl was not giving up on her want for custom cut antique miror cover plates. *Update- we now have real glass antique cover plates!* I had to shoot her down this time, she was not getting custom cut, real glass, hand antiqued mirror cover plates. She pouted. I held her hand and led her to the cover plates at Lowe’s where we picked out some nice, aged brushed nickel ones. They worked out perfect.
In fact, as I am updating this post I have to add the comments from my sister last night in regards to her backsplash. She admitted she has ‘not noticed her cover plates once, not one time.’ She had forgot the cover plates were ever an issue. She actually tried to argue with me on it. I reminded her about this right here famous blog post and she reluctantly backed down.
These cover plates looked perfect with the antique mirror.
Outlets and spray paint
It was 10:30 now, and we put those kids to bed. It was 10:30 and not a tile was on the wall yet. We poured another glass of wine and got to work. We took off the white cover plates and I suggested that we should replace the white box with black so it blends in. I meant at a later date, like down the road hire an electrician to change them. I didn’t even have a chance to turn around before she was painting them. She wasn’t just painting them, she was spray painting them. She has a can of metallic spray paint and she is just going at it with no regard to her marble counter top or freshly painted white cabinets. It worked. It looked good. It looked really good. We are masters of the hack. Disclaimer on this- I think painting outlet covers is against some basic rules in the electrical world. If you still think its a good idea, switch the breaker off first. You will want the breaker off for a future step (moving the outlet boxes out from the wall to accommodate the mirror.) You will use a screwdriver for this. Switch off the breaker. Of course I didn’t, but you should.
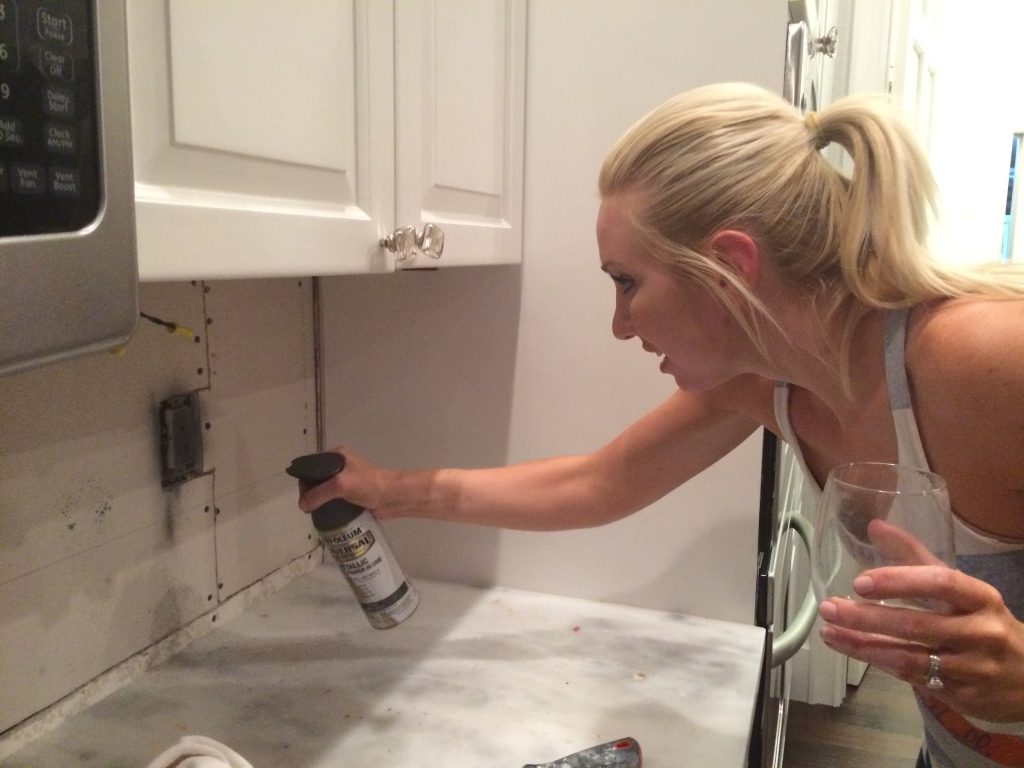
A little spray paint to hide the outlets…Why not?
Installation commences
It’s finally time to start the fun part. Installing the mirror tiles. I got to work with my magic mirror tape. Also known as Glazier’s tape. This stuff is amazing, so amazing that it’s a total pain peeling the white backside off. I brilliantly decided to run the tape on the wall, instead of piece by piece. This step cut our time in half. As we put the pieces in, we pulled the backing off as we went. Cutting our time in half was helpful, because my sister was slowing me down with selecting which pattern tile could go next to which, and where each seam needed to go, and on and on. We had come this far, we weren’t settling for less than perfection. Antique mirror backsplash perfection.
Magic mirror double face tape
You can also see where the silicone comes in. I ran a bead of black silicone in between the seams. This brilliant idea is two-fold. The silicone will deteriorate the mirror backing around the edges over time, and it hid the white wall at the seams. We admittedly got lazy and stopped using the silicone at some point. Without the silicone, we had to use something. We were not grouting, grout would make this backsplash so much less cool.
Did you say wood filler?
We went an unconventional route here. While at Lowe’s I had picked up a tube of ebony(almost black color) wood filler. Britten was wondering what we needed it for. I didn’t know for sure, but I had a hunch it might come in handy to fill in any seams we might have. That wood filler was handy in the end. We used the wood filler at every seam, and it added the perfect dimension and finished look. The silicone would have been too shiny, not to mention a mess to clean off the front of the mirrors. Without even sealer over it, this wood filler has proven itself with the test of time 3 years later.
Sister filling in the seams with the amazing wood filler
1:30 Am is electrical time
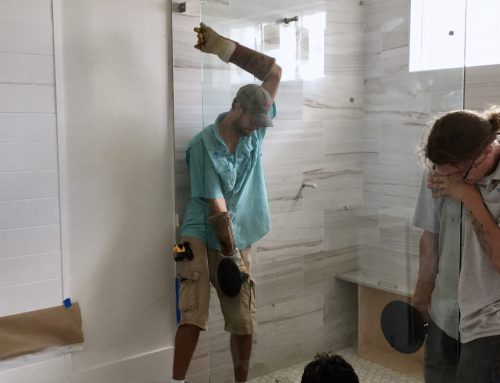
I was now dying to see the finished look. We had all the tiles up on one side of the kitchen and the last step was putting the cover plates back on. I’ve done this a million times, piece of cake. I was wrong. The outlet plugs added the final challenge of the evening. I went to put on the new cover plates to find that the little box needed to be moved out, level with the mirror tiles. Keep in mind, It’s around 1:30 in the morning now. I didn’t know how to do this but I was gonna figure it out. I grabbed a real tool, a screwdriver to be exact, and started unscrewing some screws. I decided I must have been an electrician in a previous life. I brought them out just enough to lay flush with the tiles.
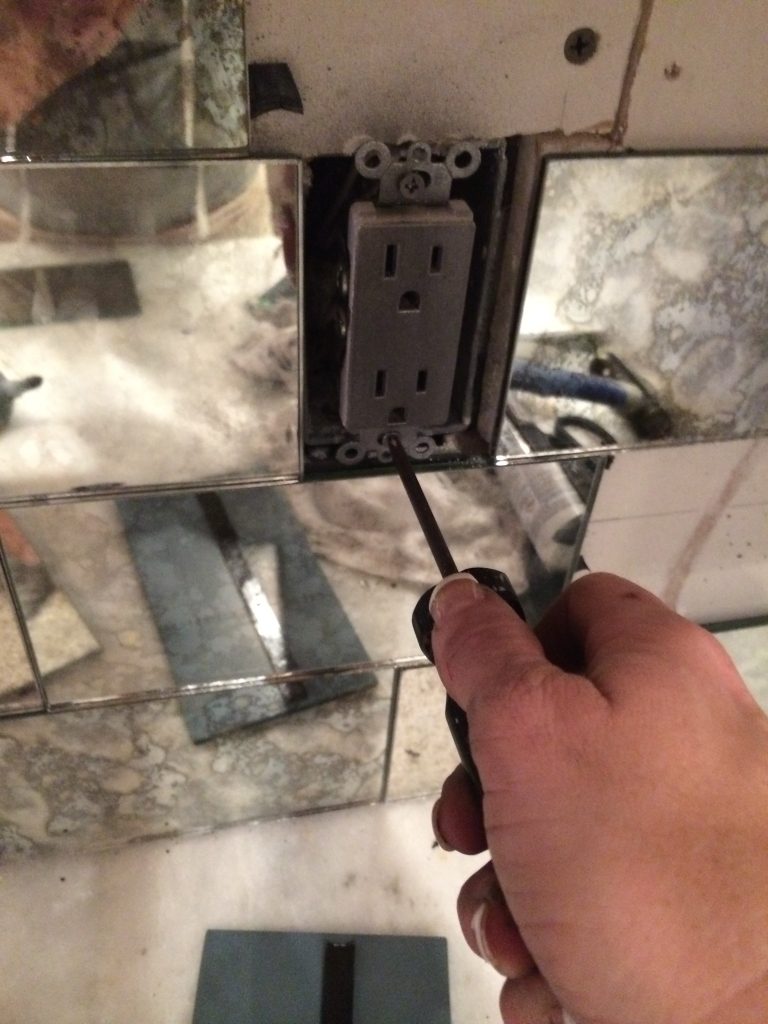
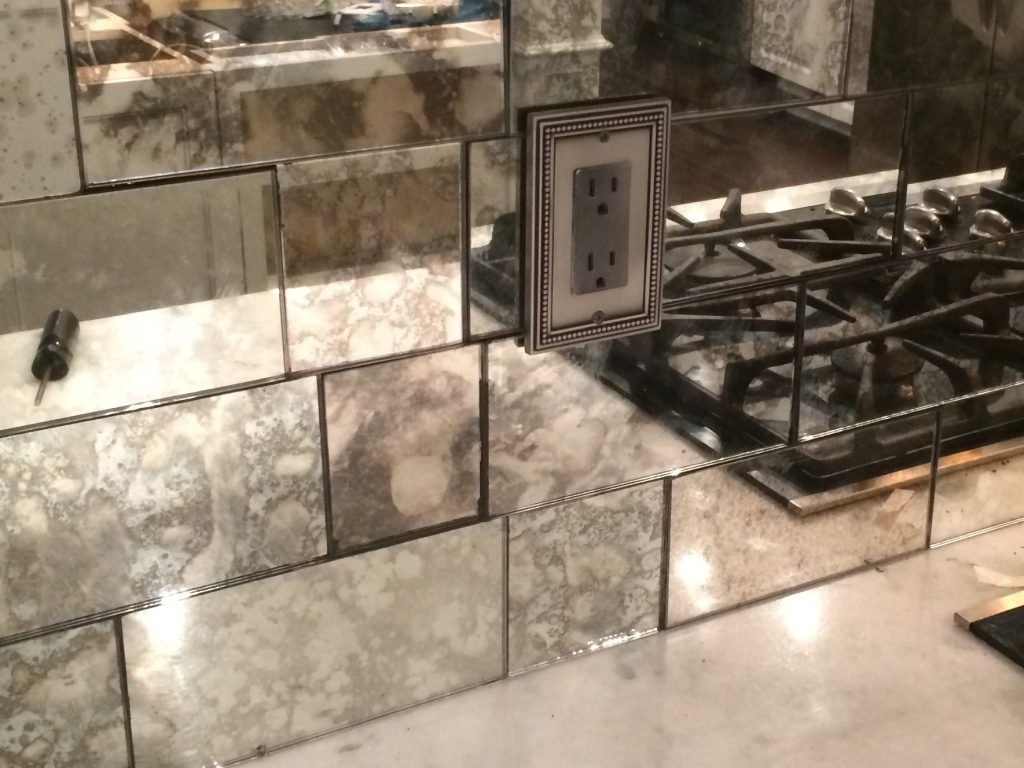
Moving the electrical outlets out to be flush with the mirror
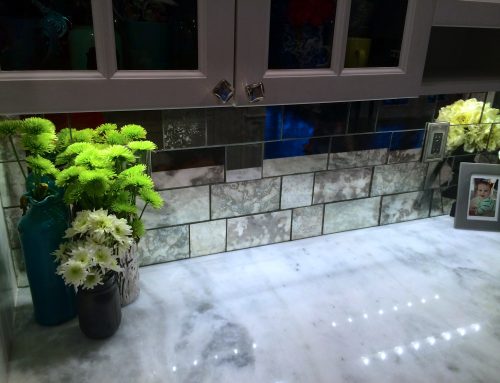
You can see in the picture, that the stars aligned, and the pieces miraculously fit around the outlets, with no cutting! It took a little strategy in the width, but the height happened to be an accidentally perfect fit under each outlet. No cutting needed. I deserved that. We so deserved that.
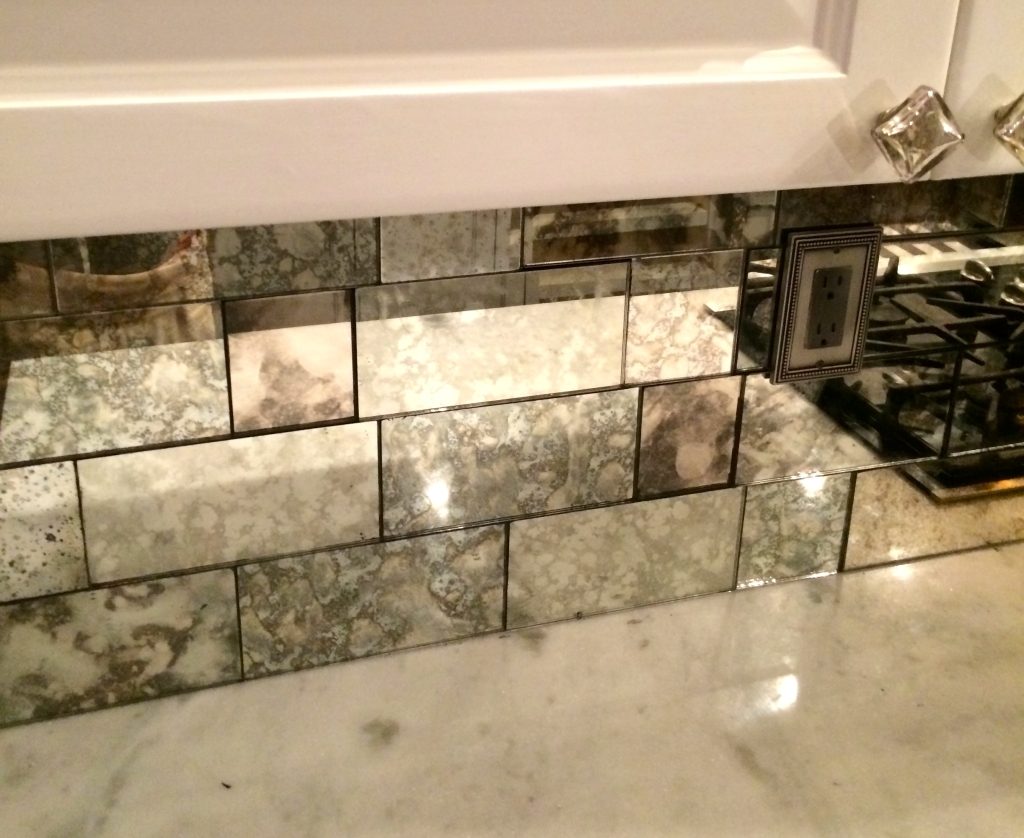
Look at the perfectly executed placement of the patterns, brick sizes, and seams.
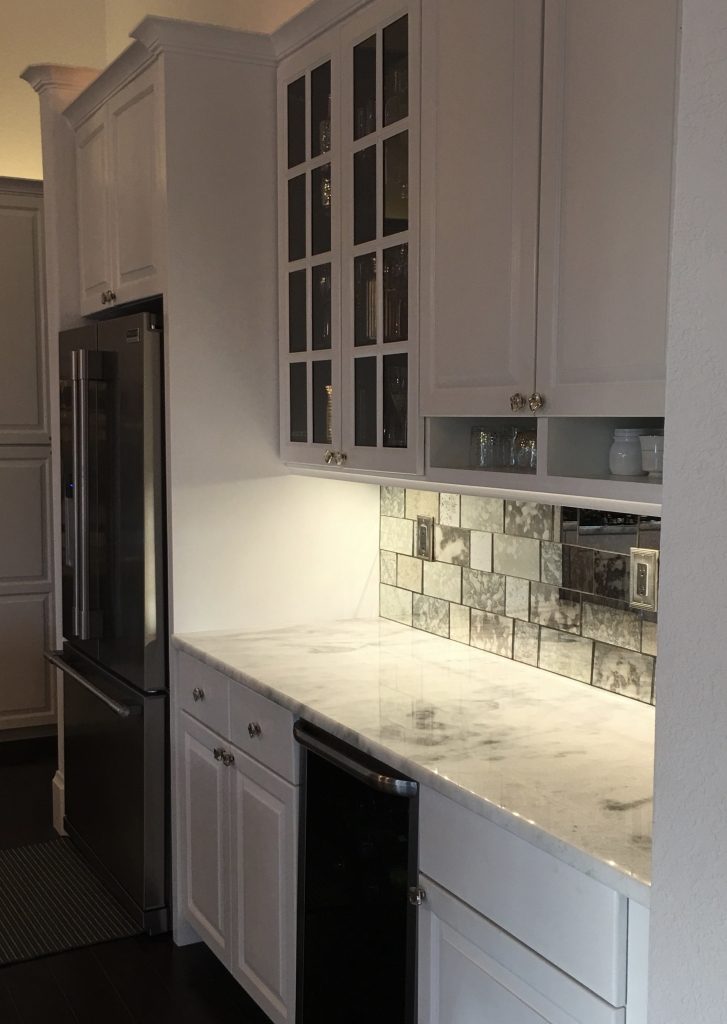
Antique Mirror Backsplash- one side was complete!
Around 2:30 am, we sat back, and admired the beauty we had created. It was so beautiful in fact, that she wanted to start on the other side of the kitchen. Right then. I know my sister and she was serious. You don’t really tell my sister ‘no.’ You just don’t, She’s a Leo. I had to be clear, so I said ‘are you crazy? Hell NO!’ I gave her my blessing to go at it and packed up my babies to head home. It was 3:30 in the morning. I never asked when it happened, but I know that the other side was complete early the next day. I had a hunch it would be.
The Real Magic Happened
So what happened next? I wrote this blog post almost 3 years ago, I didn’t know the story was just beginning to unfold. I had no idea what was about to happen. I had started our own antique mirror phenom! People started to find this post in their quest for antique mirror. They started calling and emailing. They wanted to buy our antique mirror tiles. I was humbled and grateful and over the moon. Before I knew it, I made the decision to become a stocking distributor for Omega, the gold standard in Handmade Antique Mirror. We were shipping orders all over the country. Soon Strip Tiles was born and needed a website all it’s own. You can see all the options of antique mirror we currently stock and even add them to your shopping cart, shipped right to your door. Technology is pretty amazing. Dream Big People. Dream Big. With a whole lot of passion and a little idea, big things can really happen.
Antique mirror subway tiles are available now through our online store- Strip Tiles. Order your sample set today!

My design dream come true! Would these work in a shower with Gunther White Ultra Bond mastic? I have a tiny shower I need to glam.
They are not recommended for showers unfortunately. The concern is the mirror backing can deteriorate when exposed to excessive moisture, creating a black edge spotted around the mirror. In my humble opinion, this is a positive! Natural antiquing occurs around the perimeter. I think it would only enhance the look if black edges did show up in time.
So inspired!!!! Will be doing this in my kitchen as well. Awesome job though!
So gorgeous! I’ll be reacting this and buying the backsplash from you. 🙂 What counter top type is this? Do you know what the name is? Thanks 🙂
Thank you! I believe this was a quartz product that looks incredibly close to the sought after carrera
marble. It looks gorgeous and with out the maintenance or high price tag of marble. We have our online store for our antique mirror tiles launched. It’s still in process, but it’s open for business if you’s like to visit! Antique Mirror Strip Tile- buy now!
I’m looking for a supplier and some ideas. I like the less busy look. Installing anique white cabinets and wild sea granite tops. I think the mirror back splash would be perfect.
Antique Mirror is the perfect complement with white, light colored cabinets! You can visit our new site and place orders http://www.StripTiles.com
We can also be reached by email at contact@bonitawindows.com or phone 239-947-1505
I hope this helps!
My husband and I are Rentavating a 1904 historic home in ft. Olgethorpe ga. This is what I want!!!!! I was thinking about making the backspash myself but not now that I know its produced I may not go to all the work! How does the price run?
I’m happy you found our website post regarding the antique mirror tiles!
We like to send a few samples before the order is placed. All of our collections are available at http://www.StripTiles.com
The 4” x 8” is the most popular size and the different options and pricing can be found on our sister site http://www.Striptiles.com
Keep in mind that some pieces(at the top for example) will likely need to be cut smaller. We can precut the top tiles to 2″ x 8″, for example. Any size you specify. We can also include a glass cutter and a few practice pieces to experiment with. We have also tested a glass tile cutter which can be purchased at home depot or Lowe’s. It works like a charm! It perfectly scores the glass with a nice clean break.
Hi ,This is just what I’ve been looking for, my back splash needs to reflect light & I don’t think mirror will be as hard to keep clean as a grouted tile. can this mirror take the heat from the gas cook top? no one seems to know for sure, my husband is wondering if the glass needs to heat resistant, tempered or strengthened somehow. I only want to do an area 28″x 38″as a feature over my range top
You are correct, Mirrored glass backsplashes are surprisingly easy to keep clean. In our experience the mirror does not need to be temperered, or heat resistant, even when behind a gas stove like the one shown. We have done many mirrored kitchen back splashes and the heat from the gas has not been a problem. If a tile was to break, it can easily be replaced. We do ship the tiles if you can arrange for installation, or want to try installing yourself. Please call the office or email contact@bonitawindows.com for pricing! Thank you!
Where in NY did you buy the antique mirrors? This is just what I am looking for!
This is EXACTLY what I am looking for to tile my bathroom. I am having an awful time finding it and do not want to try to antique mirrors myself!! Do you cut and sell the tiles? If so, how much would the tiles be to cover about 20 square feet?
[…] can’t believe the response to our post about installing an antique mirror tile backsplash. We have received calls and emails from all over the country inquiring about these antique mirror […]
Gorgeous! And the perfect solution to our backsplash dilemma in our new home. Can you email close up pics of the silicone and the wood filler over top? Was the silicone basically used as grout? and then the wood filler just covered that up? Can you supply brand names used for each of those products? Sorry for all of the questions but this is going to look awesome in our kitchen!!
Perfect! Love it. Where did you find the sheets of antique mirror?
Thanks! It is even more stunning in person! We distribute the tiles through our sister site http://www.striptiles.com. We also distribute antique mirror by the sheet to the trade. You can call us at 239-947-1505
Very impressive. Looks beautiful. You two rock.